Science beakers are fundamental tools in laboratories, used for mixing, heating, and measuring liquids. Whether you’re a student, researcher, or hobbyist, mastering the use of a science beaker is essential for accurate and reliable results. This guide provides practical tips to help you use a science beaker effectively, ensuring precision in your measurements and experiments.
Understanding the Basics of a Science Beaker
Before diving into advanced techniques, it’s important to understand the basic features and functions of a science beaker.
Structure and Material
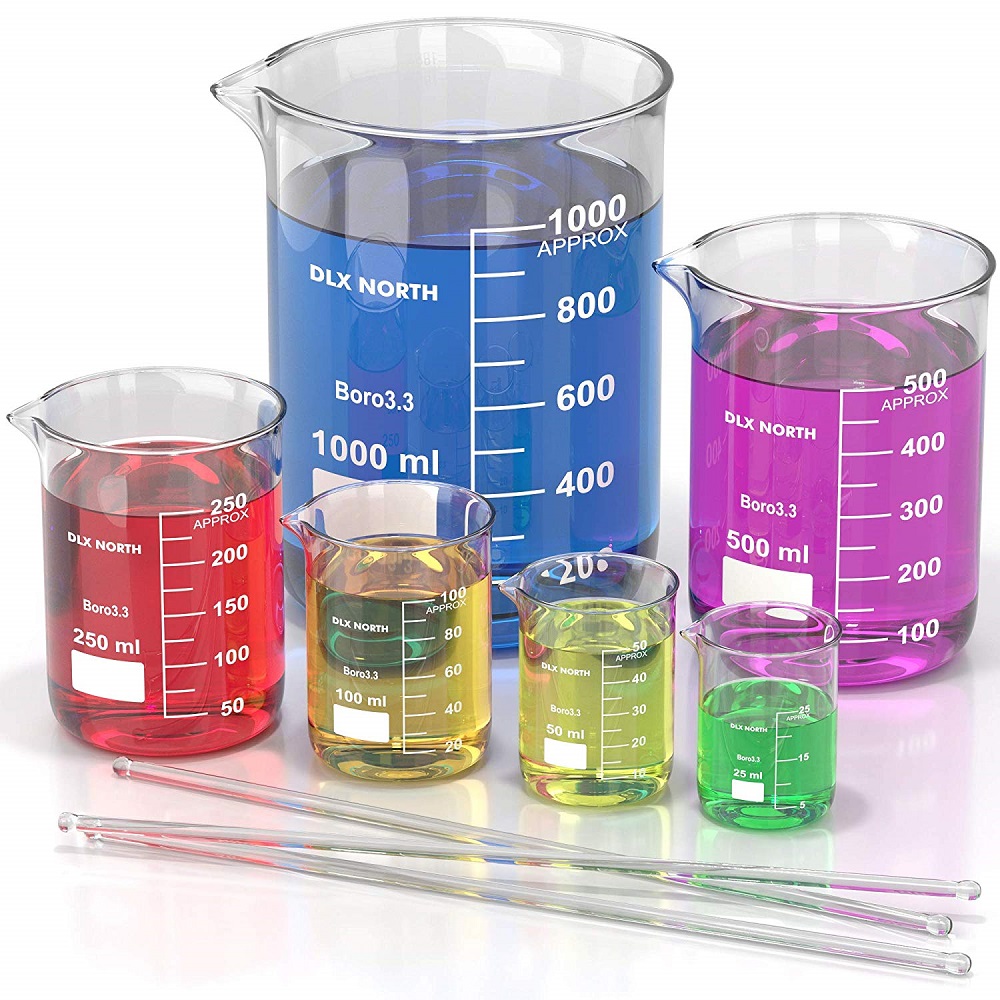
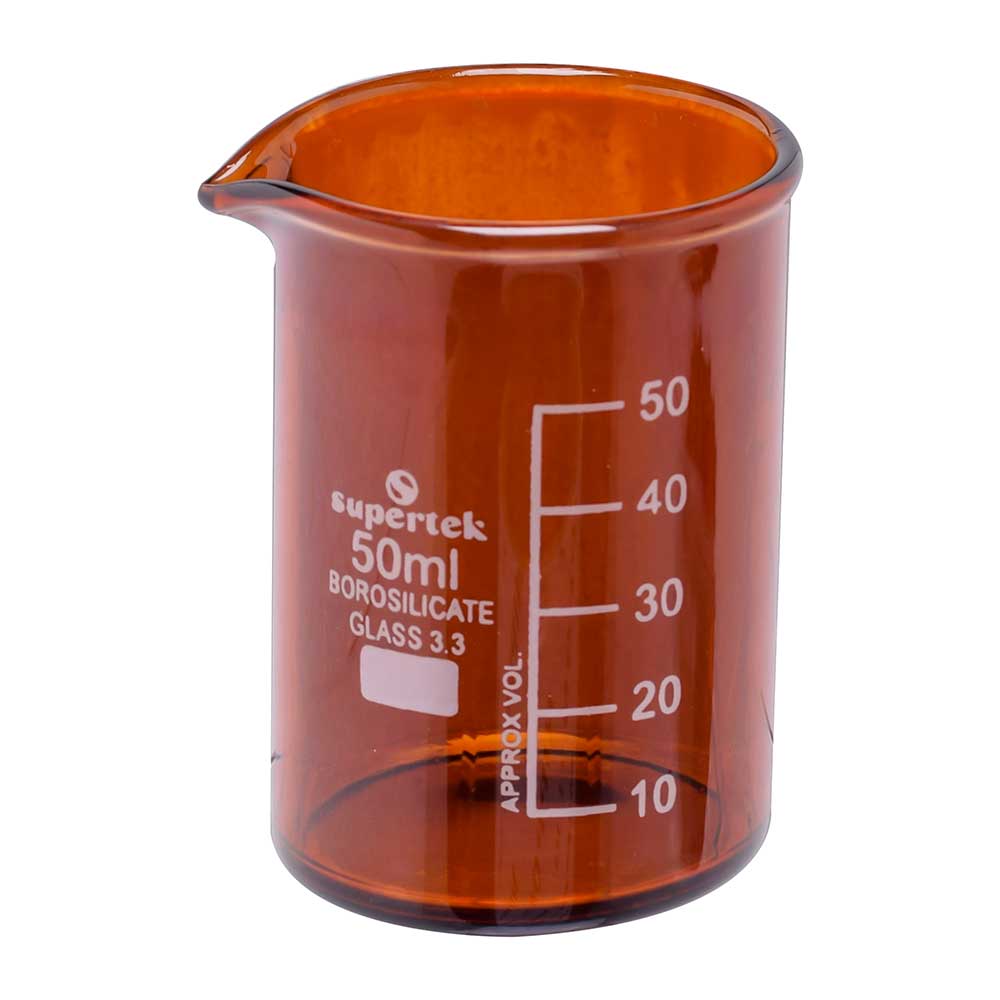
Science beakers are typically cylindrical with a flat bottom, graduated markings, and a spout for easy pouring. They are made from materials like glass or plastic. Glass beakers, often made from borosilicate glass, can withstand high temperatures and chemical reactions, making them ideal for a wide range of experiments. Plastic beakers, such as those made from polypropylene, are lightweight and resistant to breakage, suitable for handling non-reactive substances.
Sizes and Graduations
Beakers come in various sizes, from small 25 mL beakers to large 2-liter ones. Graduations on the beaker’s side indicate volume measurements, usually marked in milliliters (mL) and liters (L). Understanding how to read these graduations accurately is crucial for precise measurements. However, it’s important to note that beakers are not designed for exact volume measurements like volumetric flasks. Instead, they offer approximate volumes suitable for general laboratory use.

Selecting the Right Beaker for Your Experiment
Choosing the appropriate beaker is the first step towards achieving accurate measurements and successful experiments.
Determine the Required Volume
Assess the volume of liquids you need to work with. Selecting a beaker that comfortably accommodates your maximum volume without overflowing ensures safety and accuracy. For instance, if you need to measure 500 mL of a liquid, using a 1000 mL beaker provides ample space for mixing and any unexpected volume changes.
Consider the Material
Choose between glass and plastic based on your experimental requirements. Glass beakers are preferred for high-temperature experiments and those involving reactive chemicals. Plastic beakers are suitable for light-duty tasks, easy handling, and situations where breakage is a concern. Ensure the beaker material is compatible with the substances you are using to prevent chemical reactions or contamination.
Check the Graduations
Ensure the beaker has clear, easy-to-read graduations for your measurement needs. Some beakers have multiple graduations, providing flexibility for various experimental stages. Verify that the markings are accurate and unambiguous to avoid measurement errors.
Proper Handling and Safety Tips
Using a science beaker safely and correctly is essential to prevent accidents and ensure accurate results.
Wear Protective Gear
Always wear appropriate personal protective equipment (PPE) such as gloves, safety goggles, and lab coats. Gloves protect your hands from chemicals, while goggles shield your eyes from splashes. Lab coats keep your clothing clean and provide an additional barrier against spills.
Handle with Care
Beakers, especially glass ones, can break if dropped or subjected to sudden temperature changes. Handle them gently, supporting the base and avoiding impacts. When heating a beaker, use appropriate tools like tongs or heat-resistant gloves to prevent burns.
Use a Stable Surface
Place beakers on a stable, flat surface to minimize the risk of tipping or spilling. Avoid crowded workspaces where bumping into your equipment is more likely. Utilizing a lab bench with adequate space enhances both safety and efficiency.

Measuring Liquids Accurately
Accurate liquid measurement is crucial for reliable experimental outcomes. Follow these steps to ensure precision when using a science beaker.
Calibrate Your Beaker
Ensure your beaker is properly calibrated before use. Calibration involves checking the accuracy of the graduated markings against a known volume. If discrepancies are found, use a different beaker or adjust your measurements accordingly to maintain accuracy.
Use the Meniscus
When measuring liquids, always read the volume at the lowest point of the meniscus, which is the curve seen at the liquid’s surface. Position your eye at the level of the meniscus to avoid parallax errors, where the measurement appears larger or smaller due to the angle of viewing.
Pour Slowly and Steadily
Pour liquids into the beaker slowly to prevent splashing and spilling. A steady pour allows the liquid to settle smoothly, making it easier to read the correct volume. If adding a solution to another, use a funnel to ensure precise transfer without waste.
Mixing Solutions Properly
Proper mixing of solutions is essential for consistent and accurate experimental results. Follow these tips to achieve thorough and even mixing.
Use a Stirring Rod or Magnetic Stirrer
Employ a glass stirring rod to manually mix solutions by stirring gently in a circular motion. Alternatively, use a magnetic stirrer for larger volumes or more consistent mixing. Ensure that the stirrer bar is adequately sized for your beaker to avoid splashing or spills.
Avoid Air Bubbles
When mixing, move the stirring rod or use the stirrer in a smooth motion to prevent introducing air bubbles. Air bubbles can affect the accuracy of measurements and interfere with chemical reactions. If air bubbles form, allow the solution to settle before taking measurements.
Mix in Small Batches
For highly viscous or reactive solutions, mix in smaller batches to maintain control and prevent excessive splashing. This approach ensures that each portion of the solution is uniformly mixed before combining them into a larger container.
Heating Liquids Safely
Heating liquids in a science beaker requires caution to prevent accidents and maintain measurement accuracy.
Use a Bunsen Burner or Hot Plate
When heating a beaker, use a Bunsen burner or hot plate designed for laboratory use. Glass beakers can withstand direct heat from a burner, while plastic beakers should only be heated using a hot plate with temperature control to avoid melting or deformation.
Monitor Temperature
Keep a close watch on the temperature to prevent overheating, which can lead to evaporation, spills, or thermal shock in glass beakers. Use a thermometer to monitor the temperature accurately, especially when precise thermal conditions are required for reactions.
Employ Heat-Resistant Gloves
Wear heat-resistant gloves when handling heated beakers to protect your hands from burns. Ensure that the gloves fit properly and cover your entire hand and wrist to provide maximum protection against heat.
![]()
Cleaning and Maintenance
Proper cleaning and maintenance of your science beakers extend their lifespan and ensure reliable performance in future experiments.
Rinse Immediately After Use
After completing your experiment, rinse the beaker immediately to remove any residual chemicals or substances. This prevents staining, corrosion, and buildup that can affect future measurements and reactions.
Use Appropriate Cleaning Agents
Clean beakers with appropriate substances depending on their material and the residues they contain. For glass beakers, use mild detergents and avoid abrasive scrubbers that can scratch the surface. For plastic beakers, gentle soaps are sufficient, and avoid harsh chemicals that may degrade the material.
Inspect for Damage
Regularly inspect your beakers for cracks, chips, or other damage. Damaged beakers should be discarded or repaired, as they can compromise safety and measurement accuracy. Maintaining your beakers in good condition ensures they remain reliable tools in your laboratory arsenal.
Advanced Measurement Techniques
For more precise measurements, consider adopting advanced techniques when using a science beaker.
Tare the Beaker
When measuring the volume of a liquid, tare (zero) the beaker if using it with a balance. Place the empty beaker on the balance and reset it to zero before adding the liquid. This ensures that only the weight of the liquid is measured, leading to more accurate results.
Use a Pipette for Small Volumes
For smaller volumes, use a pipette in conjunction with the beaker to transfer precise amounts of liquid. Pipettes allow for accurate dispensing, minimizing errors that can occur when measuring directly from the beaker.
Temperature-Controlled Beakers
Incorporate temperature-controlled beakers for experiments requiring precise thermal conditions. These beakers are equipped with built-in temperature sensors and heating elements, allowing for exact temperature regulation and improving the accuracy of your measurements.
Troubleshooting Common Issues
Even with the best practices, you may encounter common issues when using a science beaker. Here’s how to address them effectively.
Inconsistent Measurements
If your measurements seem inconsistent, check for calibration errors and ensure you are reading the meniscus correctly. Recalibrate your beaker if necessary and use a steady hand when pouring and measuring liquids.
Contaminated Solutions
To avoid contamination, clean your beaker thoroughly after each use. Use separate beakers for different experiments and ensure that residues are completely removed before starting a new measurement.
Cracked or Damaged Beakers
Always inspect your beakers for signs of damage before use. Replace any cracked or chipped beakers to prevent spills and ensure the integrity of your measurements.
Best Practices for Using Science Beakers
Adopting best practices enhances the accuracy and safety of your measurements with science beakers.
Label Your Beakers
Clearly label each beaker with its contents and concentration to prevent mix-ups during experiments. Use waterproof labels or a marker that won’t smudge or fade over time.
Organize Your Workspace
Maintain a clean and organized workspace to facilitate accurate measurements and reduce the risk of accidents. Keep all necessary tools and materials within easy reach and ensure that the workspace is free from clutter.
Follow Standard Operating Procedures
Adhere to standard operating procedures (SOPs) for using science beakers, especially in professional laboratory settings. SOPs provide guidelines for handling, measuring, and cleaning to ensure consistency and safety across all experiments.
Conclusion
Mastering the use of a science beaker is fundamental for achieving precise and reliable measurements in various experiments. By understanding the basics, selecting the right beaker, handling it safely, and employing accurate measurement techniques, you can enhance your laboratory skills and ensure successful outcomes.
