Introduction to Microscope Diagrams
Microscopes have redefined our ability to study minute objects, from simple cells to complex microorganisms. Understanding the layout of a microscope aids in appreciating its functions and capabilities. A microscope diagram serves as a detailed map, guiding users to identify each part and comprehend its role in the overall mechanism.
Microscope diagrams are vital for students, researchers, and anyone involved in microscopy. They provide clarity on the assembly of the device and facilitate correct usage. With a proper blueprint, care, and handling of the microscope becomes more intuitive, leading to better maintenance and longevity.
Each part of a microscope, illustrated in a diagram, works in harmony to magnify and reveal the invisible details of tiny worlds. Knowing the parts through diagrams enhances the user’s skill in operating the device. It also instills confidence in making precise adjustments for clear, magnified views.
To those new to microscopy, diagrams are educational tools that break down complex structures into understandable components. For the seasoned professional, they’re helpful reminders of the intricacies that make microscopes such powerful instruments of discovery.
By learning about each part’s function from a microscope diagram, we can advance our scientific exploration and continue the legacy of innovation that microscopy represents. Let’s embark on this visual tour to grasp how each component works together to unlock the microscopic universe.

The Anatomy of a Microscope
Structural Components
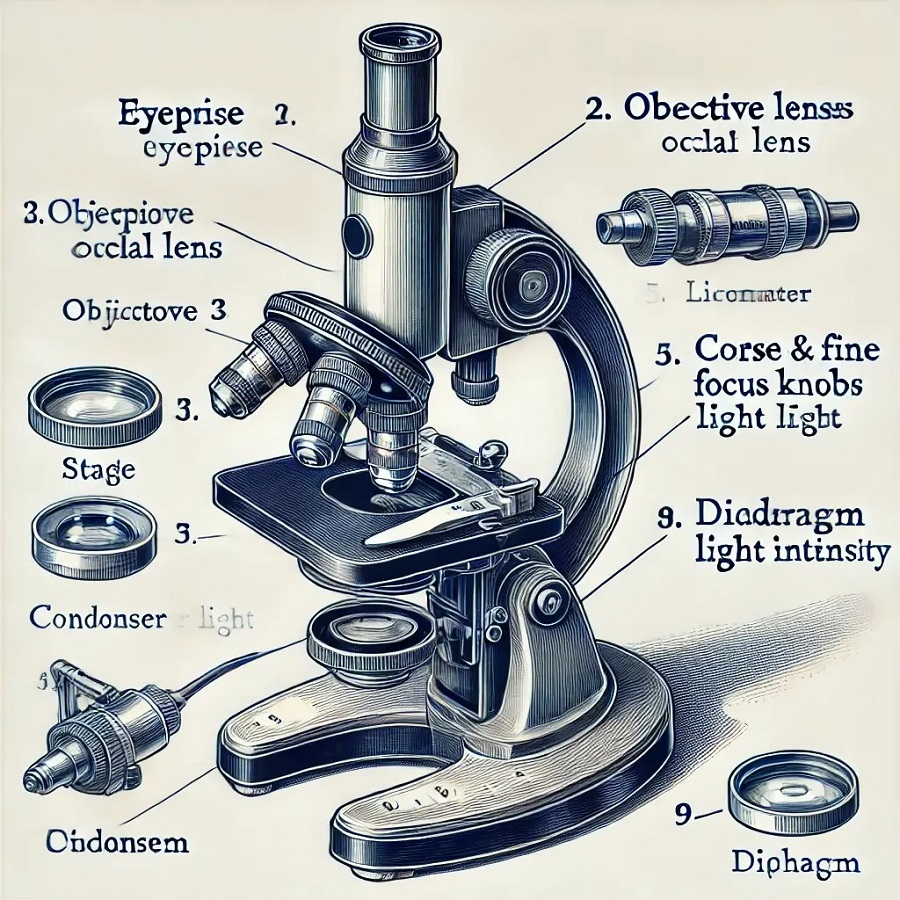
Every microscope consists of two fundamental groups of parts: structural and optical. The structural components form the framework that supports and stabilizes the device. Here we will examine these integral structural parts:
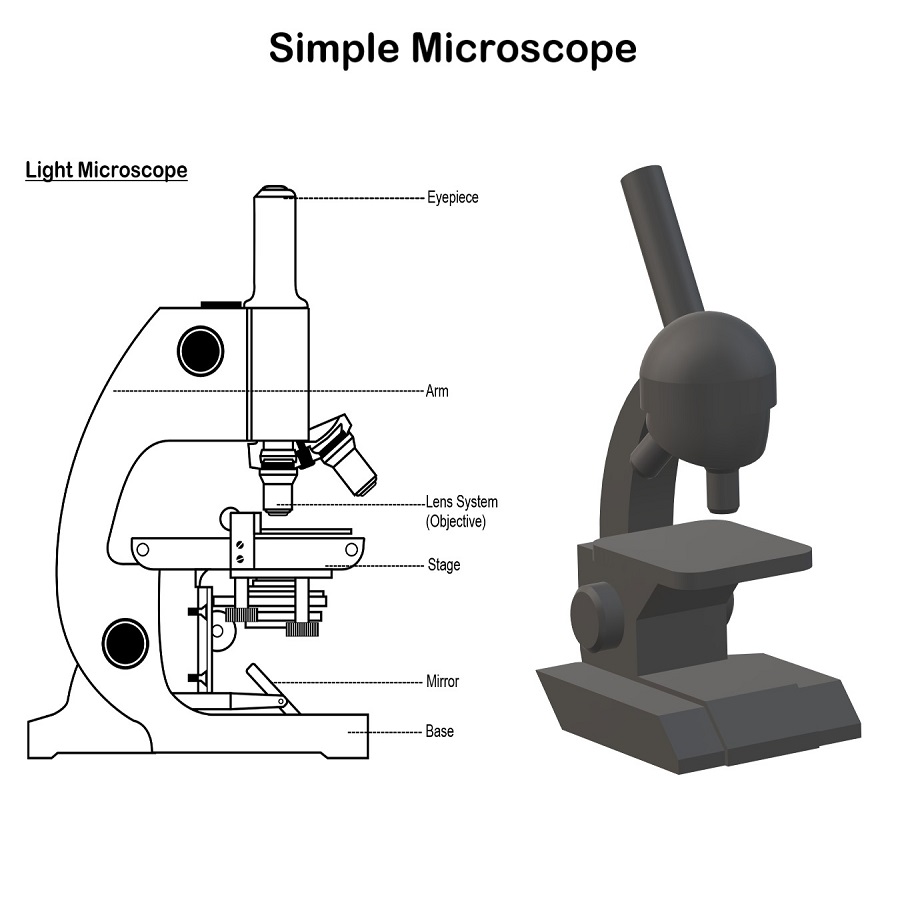
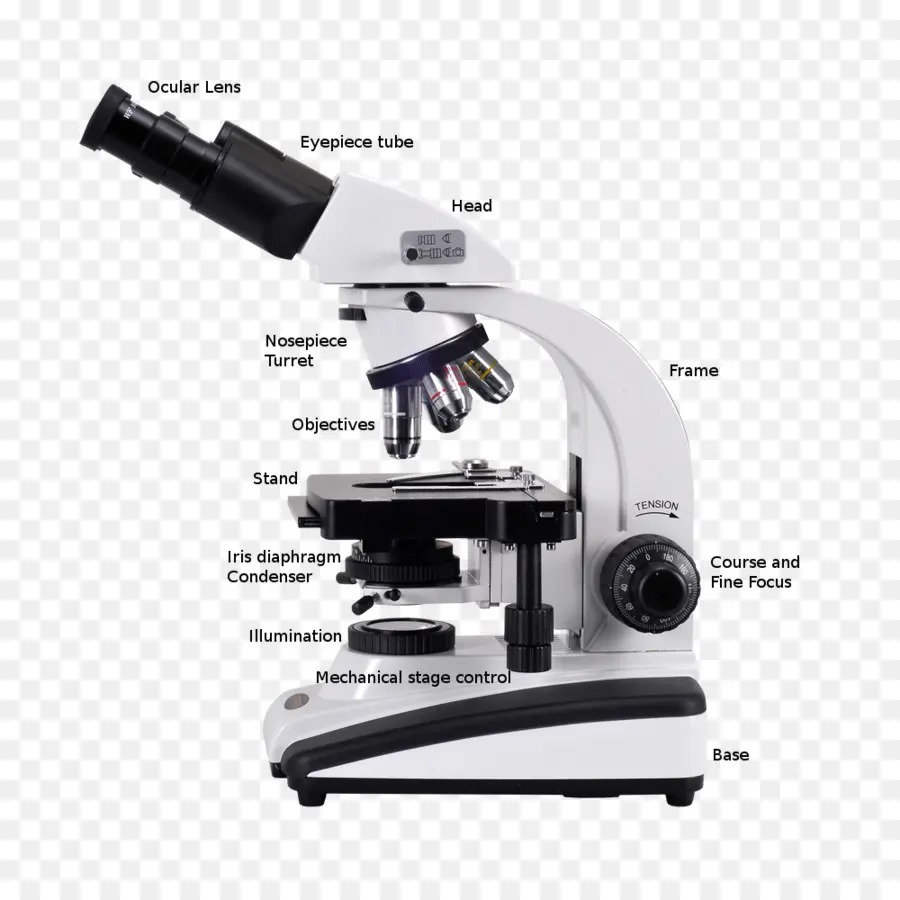
- Base: Serving as the foundation, the base carries the weight of the microscope, ensuring stability.
- Arm: Connecting the base to the head, the arm facilitates carrying and provides additional support.
- Head (or Body Tube): It holds the optical elements in the upper part of the microscope and aligns them.
- Nosepiece: Affixed to the bottom of the head, this rotating piece holds objective lenses.
These parts, though seemingly simple, are crucial for the durable and correct functioning of the microscope. Without a sturdy structure, precision in microscopic work would be compromised.
Optical Components
Optical components are responsible for magnifying and resolving the image of the specimen. These include:
- Eyepiece (Ocular Lens): Positioned at the top, it’s where you look through to see the magnified image.
- Objective Lenses: Attached to the nosepiece, they are the primary lenses for magnification and are usually of varying powers (e.g., 4X, 10X, 40X, 100X).
- Condenser: Located under the stage, it focuses light onto the specimen, improving image clarity.
- Diaphragm: This controls the amount of light reaching the specimen and thus affects image contrast.
The synergy between these parts allows us to observe objects at a scale invisible to the naked eye. Together, the structural and optical components of a microscope create a device that has vastly expanded our vision and understanding of the microscopic world.
A Close Look at Objective Lenses
Objective lenses are the heart of a microscope’s magnifying power. These lenses come in sets, typically 4X, 10X, 40X, and 100X magnifications. Let’s examine their specifics:
- Low-power lenses (4X and 10X) help locate and center the specimen. They provide a broader view.
- High-power lenses (40X) offer detailed examination of smaller areas with increased magnification.
- Oil immersion lenses (100X) require oil to view specimens at the highest magnification.
Each lens has a different color band. This helps to quickly identify its magnifying power. When rotating the nosepiece, the lenses click into place. This ensures alignment with the eyepiece.
In use, objective lenses collect light from the specimen. They create a magnified image that the eyepiece further enlarges. The combination of lenses results in the total magnification you observe.
It’s essential to handle these lenses with care. Avoid touching the glass, as fingerprints can blur images. Always start with the lowest magnification. You can increase power as you fine-tune the focus on the specimen.
Objective lenses contribute greatly to a microscope’s function. Understanding their roles and how to use them enhances our observation skills.

Understanding Stage Adjustments and Focus
Adjusting a microscope’s stage and focus is essential for clear viewing. Here’s how they work:
- Stage Adjustments: The microscope stage is where you place the slide. It has knobs to move it around.
- Coarse Adjustment: A big knob to move the stage up or down quickly. It’s for low magnification.
- Fine Adjustment: A smaller knob for detailed focusing. Use this with high-power lenses.
First, use the coarse adjustment to get the specimen into a rough focus. Then, switch to the fine adjustment to sharpen the image. Always start with the lowest power objective lens.
Remember, moving the stage while looking through the eyepiece can help you find the best view of your specimen. Practice makes perfect when learning these adjustments. Be patient and gentle when turning the knobs to avoid damaging the microscope or the slide.
The Intricate System of Illumination
Illumination is vital for viewing specimen details through a microscope. It works hand-in-hand with the microscope’s optical system, casting light from the base and through the sample for clearer visibility. In this section, we’ll delve into the components that illuminate the unseen world.
Light Sources in Modern Microscopes
Modern microscopes use various light sources to illuminate specimens. Common ones are LED, halogen, and fluorescent bulbs. LED lights are popular for their bright, white illumination and longevity. Halogen bulbs provide intense, focused light. Fluorescent lights excel in low heat emission, essential for live samples. Your choice of light source can affect visibility and heat-sensitive specimen integrity.
Role of Condensers and Diaphragms
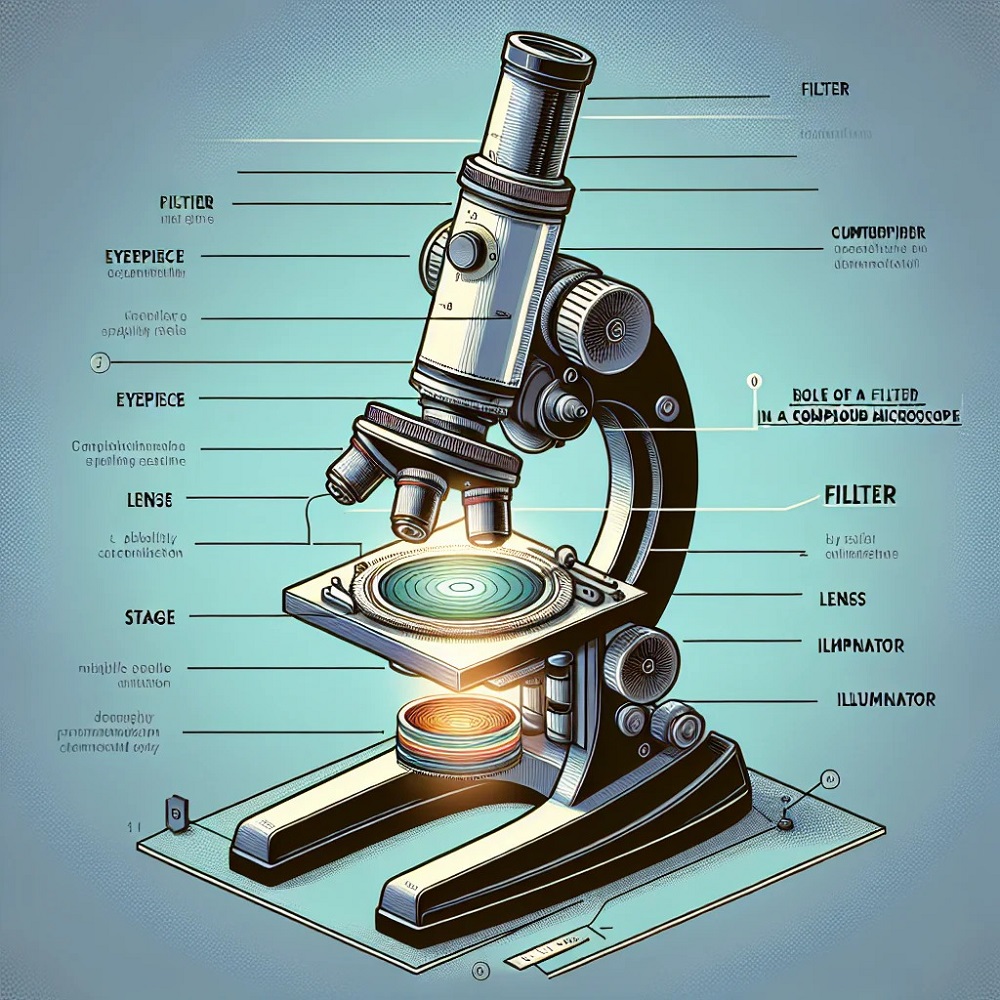
Condensers focus light onto the specimen. They improve image clarity by gathering and directing light beams. Diaphragms, often adjusted with a lever, control light intensity. These intricate systems allow precise light management. They affect image contrast and sharpness. Properly adjusted, they can enhance fine details in samples. Together, condensers and diaphragms optimize light for the best microscopic observations.
Eyepiece: The Window to Magnification
The eyepiece, also known as the ocular lens, is a vital microscope component. It’s where users peer through to view the specimen. Eyepieces commonly have magnification levels ranging from 5X to 30X. The typical magnification is 10X, ideal for most viewing purposes.
When looking through the eyepiece, what you see is the enlarged image produced by the objective lenses. It’s this combination that determines the microscope’s total magnification. To calculate it, you multiply the eyepiece power by that of the objective lens.
Here’s a clearer breakdown of eyepiece functions:
- Magnifies Image: The eyepiece makes the already enlarged specimen appear even larger.
- Houses Reticle: Some eyepieces include a reticle, or a pointer, for measurement or location purposes.
- Collaborates with Objectives: It works with the objective lenses to boost the magnification.
- Adjusts to Viewer: With diopter adjustments present in some models, it can correct vision differences.
Taking good care of the eyepiece is important. Clean it gently with special lens paper to avoid scratches. Adjust its diopter, if available, to suit your eyesight before starting your observations. The eyepiece is your window to the microscopic world, enabling you to magnify and explore specimens with clarity.

The Significance of the Microscope Base
The base of a microscope does more than just hold the device up. Its importance is often overlooked, yet it’s fundamental to the microscope’s stability and functionality. Here we highlight the significant roles of the microscope base:
- Supports the Whole Structure: The base acts as a robust platform for every other part. It must be sturdy to prevent any wobbling or tilting which could lead to blurry imaging or even damage to the microscope and specimens.
- Houses Light Sources: In most modern microscopes, the base contains the illuminator. This could be LED, halogen, or another light type. It’s essential for sending light through the sample for clear viewing.
- Connects to the Arm: The arm and the base work in tandem. The arm serves as the main support for the head, while the base provides the anchoring needed for a stable view.
- Carries Electrical Components: For microscopes with built-in illumination, electrical components are embedded in the base. These include wiring for the light source and sometimes circuitry for digital displays or cameras.
- Maximizes Portability: A good base allows for easier transportation of the microscope. With a handle incorporated into the arm, you can safely move the instrument without affecting sensitive optical parts.
- Integrates Anti-Vibration Features: High-end microscopes have bases with dampening materials. These reduce vibrations from the surrounding environment to maintain the quality of the specimen’s image.
In summary, the base is the foundation of a microscope’s form and function. It supports, stabilizes, and houses critical components, making it as essential as the lenses that magnify the microscopic world.
Exploring Various Types of Microscopes
The world of microscopes is diverse, with various types developed for specific functions. The light microscope is one of the most used, ideal for viewing stained or living cells. With its lenses and light source, it shows us vibrant images of our microscopic world.
Another notable type is the electron microscope. It uses electrons instead of light to create an image. This allows for greater detail, magnifying objects up to two million times. It’s key in viewing the ultrastructure of cells.
The phase contrast microscope is another type. It stands out for its ability to view live cells without staining. This is crucial in studying cell behavior in real time.
Fluorescent microscopes light up specific parts of a sample using fluorescence. This type is vital in molecular biology research.
Dark-field microscopes offer high contrast images of specimens against a dark background. They’re excellent for detecting tiny particles that are invisible in a light microscope.
Dissecting or stereo microscopes provide a 3D view of larger specimens. They’re often used in biology labs for dissection or examining surface details.
Each type of microscope diagram helps us understand how they work. Knowing the correct type for your needs enhances the study of specimens. Whether in research, education, or clinical diagnostics, microscopes are crucial tools. They let us magnify, observe, and understand tiny worlds unseen by the naked eye.
Final Observations: The Union of Parts and Their Collective Function
In our exploration of the microscope diagram, we’ve uncovered the roles and relevance of each part. As we’ve seen, individual components of a microscope, from the sturdy base to the magnifying lenses, each contribute to its ability to present the unseen world in stunning detail.
The structural components, such as the stable base and supportive arm, provide the necessary strength. These parts ensure that the device stands firm during use. The head, housing optical elements, aligns lenses for sharp imaging.
On the other hand, the optical components are the key to magnification. The eyepiece amplifies while the objective lenses increase detail. The condenser and diaphragm manage light, enhancing clarity and contrast.
To operate a microscope effectively, one needs to understand how these parts function together. It starts by placing your sample on the stage, using the coarse and fine adjustments to focus. Clear images are achieved by properly aligning the lenses and optimizing the light sources.
As we toggle between the various types of microscopes, their unique functions stand out. Whether it’s a light microscope for everyday lab work or an electron microscope for high-resolution images, each type has its place.
The journey through the microscope’s anatomy reaffirms the complexity of design and function. Every part, whether it shines light or magnifies an image, plays a significant role in the overall performance.
In conclusion, the microscope is an example of precision engineering. The alignment of each part allows us to delve into the microscopic universe with ease. By mastering the use of its various components, we can continue to unveil the wonders of the micro world.
